

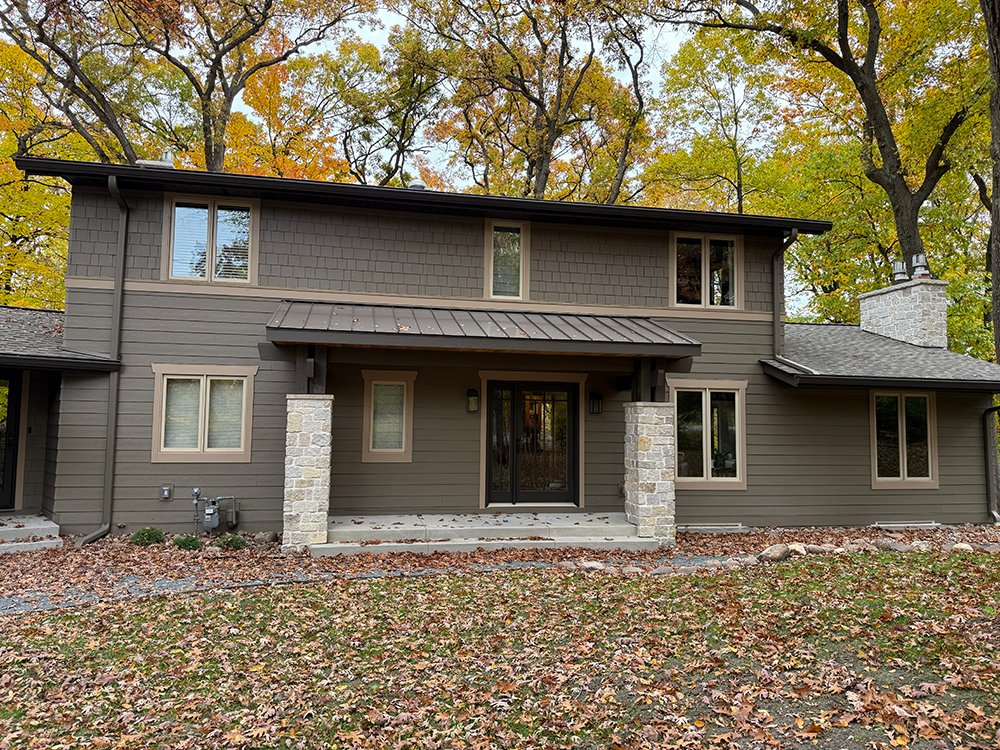
Exterior remodeling is one of those projects where the final result looks “simple” only when the planning was done right. New siding can absolutely transform a home’s appearance, but the best-looking, longest-lasting jobs are rarely about siding alone. The real wins happen when siding replacement is coordinated with the other exterior systems that touch it every day, especially windows, doors, and gutters.
That coordination is not about upselling a bigger project. It is about sequencing, water control, and clean transitions so you are not undoing fresh work a year later. If you are already investing in new siding, it is worth taking a step back and asking: What else connects to this wall, and what will be harder (or more expensive) to fix after the siding is on?
Below is a practical, contractor-friendly breakdown of how to pair siding replacement with windows, doors, and gutters for a more complete, better-performing exterior remodel.
Think Like Water (and Air), Not Like Materials
Most exterior problems are not “siding problems.” They are water problems and air problems that happen to show up at the siding.
Siding is a cladding. It is a protective outer layer that sheds bulk water and takes the sun, wind, and impact so the structure does not have to. Behind it, the real performance comes from:
- A continuous water-resistive barrier (WRB), like housewrap or a fluid-applied membrane
- Proper flashing at every opening and change in plane
- Sealed transitions that manage both liquid water and airflow
- Thoughtful drainage and drying pathways
When you replace siding, you are touching all of those layers, even if you never see them after the project is finished. That is why windows, doors, and gutters matter so much. Each one creates penetrations, edges, and runoff patterns that either work with your wall assembly or fight it.
Why Pair Siding With Windows?
1) New siding exposes old window weak points
Windows often leak at the edges, not through the glass. The trouble spots are the perimeter, where trim, WRB, and flashing should act like overlapping shingles. Over time, caulk fails, small gaps appear, and older flashing details may not meet modern best practices.
If you install new siding around older windows without addressing the window-to-wall interface, you can end up “wrapping” new materials around an old vulnerability. The siding may look great, but the first serious wind-driven rain will find the same weak point.
2) Proper flashing is easier when the wall is open
The best time to correct flashing is when the siding is off and the rough opening is accessible. That is when installers can:
- Inspect the sheathing and framing around window openings
- Repair rot or delamination before it spreads
- Integrate head flashing properly
- Create clean WRB transitions with tape and compatible sealants
Trying to add correct flashing after the fact is possible, but it becomes a compromise. You are working around finished materials and you often cannot tie the layers together as reliably.
3) Trim strategy affects the entire look
Even if windows are staying, this is the moment to decide how trim will be handled. Options vary by material and style, but the key is consistency. A common issue in “piecemeal” remodels is that the window trim profile and the siding profile feel like they belong to different houses.
If you are changing the siding style, such as moving from horizontal lap to board-and-batten, or switching the exposure, you should evaluate:
- Trim thickness and reveal depth
- Corner board proportions
- Sill details and whether they shed water
- How the trim interfaces with J-channels or metal coil wrap where applicable
A coherent trim plan can make the whole exterior look intentional, even if windows are not replaced.
When to Replace Windows During a Siding Project (and When Not To)
Not every siding job should become a window project. Here are solid decision triggers that are more practical than “replace them if they are old.”
Consider replacing windows during siding replacement if:
- You have visible water staining or soft wood at interior window corners
- The exterior trim shows recurring rot or peeling paint even after repairs
- You see fogging between panes, failed seals, or drafts you cannot solve with weatherstripping
- You are changing wall thickness or adding insulation that will affect window returns
- You are aiming for a specific exterior style that requires different window proportions or trim details
Consider keeping windows if:
- They are performing well and the flashing and openings are sound
- The project budget is better spent on WRB upgrades and correct detailing
- The window trim strategy can be improved without full replacement
The key is coordination. If windows are staying, make sure the scope includes proper flashing integration and repair of any damaged substrates around openings.
Doors: The Most Abused Opening on the House
Entry doors, patio doors, and service doors see heavy traffic, impact, and weather exposure. They also intersect with critical details that are easy to get wrong.
1) The sill pan is not optional
Door thresholds are notorious leak points. Water can enter from wind-driven rain, snow buildup, or even a simple hose used too close to the opening. A proper sill pan or pan flashing, plus correct integration with the WRB, is a foundational detail.
If you are replacing siding and leaving a questionable door detail untouched, you are risking hidden damage behind brand-new materials.
2) Kick-out flashing and roof-to-wall intersections
Many doors sit near rooflines, porch roofs, or small overhangs. When a roof edge dumps water into the wall plane, you get concentrated runoff right where trim and seams live. Kick-out flashing at roof-to-wall intersections is a small detail that prevents a lot of expensive rot.
Siding replacement is an ideal time to verify that these transitions exist and are correctly installed.
3) Casing, brickmould, and trim depth
Door trim often has thicker profiles than window trim, and it needs to project correctly so water drips away instead of running behind it. If you are changing siding thickness, especially when moving between materials, you may need to adjust trim build-outs so the door does not look “sunken” or poorly finished.
A clean door surround does two things: it looks better and it sheds water better.
Gutters: Your Siding’s Best Friend, If They’re Done Right
It is easy to underestimate gutters during an exterior remodel because they feel like an accessory. They are not. Gutters control the water volume that hits your siding and foundation. In many climates, they also influence ice formation along the eaves.
1) New siding will not fix bad roof drainage
If gutters are undersized, improperly sloped, or constantly overflowing, siding will be punished. Splashback can stain cladding, saturate lower wall sections, and accelerate paint failure. Over time, chronic wetting can lead to decay behind the siding.
A siding project is a natural time to evaluate:
- Are gutters sized correctly for roof area and pitch?
- Are downspouts placed where water can be carried away from the foundation?
- Are there areas where water is dumping directly onto a wall?
- Are gutter guards helping or hurting flow, depending on debris type?
2) Fascia and drip edge coordination
Gutters attach to fascia. Fascia ties into soffit and roof edge details. Those edges connect to the wall system. If fascia is rotted or poorly covered, you may install perfect siding and still have a vulnerable roofline where water can migrate behind the system.
During siding replacement, the roof edge should be reviewed as a complete assembly:
- Drip edge condition
- Fascia integrity and coverage
- Soffit ventilation path
- Gutter attachment method and stability
Even if gutters are not replaced, corrections to attachment points and fascia conditions can prevent future failures.
3) Downspout discharge matters
A common remodeling mistake is installing new downspouts that dump water too close to the foundation or into landscaping that traps moisture against the siding. New cladding looks great until the bottom courses show staining or swelling from repeated wetting.
Good discharge planning is basic and often overlooked. It protects the whole system.
Sequencing: The Order You Do Things Can Save (or Waste) Thousands
One of the biggest advantages of pairing siding with windows, doors, and gutters is proper sequencing. Here is a sensible, general order that supports better detailing:
- Demolition and inspection
- Remove old siding and trim as needed.
- Inspect sheathing, framing, and moisture damage.
- Structural and substrate repairs
- Replace rotted wood, correct uneven surfaces.
- Address pest damage or mold issues.
- WRB and flashing upgrades
- Install or repair housewrap or membrane.
- Tape seams and integrate transitions.
- Window and door work
- Replace windows and doors if part of the plan.
- Install sill pans and flash openings.
- Trim and accessory planning
- Set corner boards, window trim, and door casings.
- Confirm profiles and reveals before siding goes up.
- Siding installation
- Follow manufacturer requirements for fasteners, clearances, and ventilation.
- Gutter work and final drainage tuning
- Repair fascia if needed.
- Install or reset gutters and downspouts for proper pitch and discharge.
- Final sealants, touch-ups, and walk-through
- Seal only where appropriate. Do not rely on caulk as a “waterproofing system.”
- Confirm flashing is doing the heavy lifting.
Your exact order may vary based on the wall system and scope, but the principle stays the same: build the water-management layers from the inside out, and do not bury problems behind new materials.
Design Consistency: Make the Whole Exterior Look Intentional
Even on informational guest posts, it is worth calling out that “exterior remodeling” is part construction science and part visual coordination. Siding, windows, doors, and gutters form the home’s visual framework. Small mismatches can make a high-cost project feel unpolished.
A few design coordination tips that have nothing to do with trends:
- Pick a trim thickness standard and stick to it.
- Match corner and casing proportions to the siding profile and exposure.
- Coordinate gutter and downspout color with fascia and trim, not just the roof.
- Avoid mixing too many surface textures on the same facade unless there is a clear hierarchy.
These decisions are easier to make before installation starts, not after the first wall is complete.
Common Mistakes When These Systems Aren’t Coordinated
If you want a quick “what not to do” list, here are repeat offenders:
- Installing new siding without correcting missing head flashing at windows.
- Relying on caulk as the primary defense instead of layered flashing.
- Leaving rotted window trim or door framing in place to “save money.”
- Installing gutters that overflow onto brand-new cladding.
- Forgetting kick-out flashing where rooflines meet walls.
- Creating trim details that trap water, especially on horizontal ledges.
- Ignoring bottom clearances and grade separation, which can lead to moisture wicking.
None of these issues are rare, and most of them are preventable with planning.
A Practical Takeaway
Pairing siding replacement with windows, doors, and gutters is not about making a project bigger. It is about making the project make sense.
When these systems are planned as one exterior envelope, you get:
- Better moisture control and fewer hidden surprises
- Cleaner finishes at openings and edges
- Longer material life and fewer callbacks
- An exterior that looks cohesive, not patched together
If you are writing, planning, or estimating an exterior remodel, the most useful question is not “What siding are we using?” It is “How will water and air move around this house after the remodel?” Answer that well, and the siding, windows, doors, and gutters will all perform better together.